Showing posts with label seeds. Show all posts

Friday, April 12, 2013

Lasagna Gardening

Lasagna Gardening: A New Layering System for Bountiful Gardens: No Digging, No Tilling, No Weeding, No Kidding!Lasagna Gardening: A New Layering System for Bountiful Gardens: No Digging, No Tilling, No Weeding, No Kidding! by Patricia Lanza
My rating: 5 of 5 stars

I found Patricia Lanza’s “Lasagna Gardening” to be highly inspirational. This is a gardening method that anyone can try. It is basically sheet composting inside of a garden bed, but instead of waiting for the compost to be fully processed, you can plant inside a lasagna garden as soon as it is built.

One of the keys to lasagna gardening is using the organic materials that you have on hand. I have a lot of oak leaves, grass clippings and garden waste on hand, so that is what I will be using to build my lasagna beds. Though the oak leaves can make the soil highly acidic, I’ll temper that with a dusting of wood ash that I saved from my winter fires.

There are only two things that I found as drawbacks to this book. The first is Lanza’s dependence on using large quantities of Sphagnum moss. This is a product that takes hundreds of years to grow back, so it is practically unsustainable. I do not want to use Sphagnum in my gardens at all. I am going to find an alternative to the moss that is a renewable resource. I am considering using a combination of Spanish moss (which I have tons of in my yard) and coconut coir. I’ve used the coir in the past as part of a potting mix. It holds water similarly to the Sphagnum moss and it is highly renewable, so I think that’s a good alternative.

The second is her recommendation of hybrid plants. I don’t have a moral argument against using hybrids, but you can’t save seed from hybrid plants, so you can’t build a series of garden plants that are adapted perfectly to your garden if you are using hybrids. It’s a small complaint, but I would have appreciated more recommendations of heirloom varieties.

Other than that, this book is very thorough. Whether you want to grow vegetables, herbs, flowers, or even start a container garden, Lanza has you covered in this book. She lays out the simple steps to building a lasagna garden bed, and then goes into how to care for different kinds of plants in the new bed(s). The method is so simple and low-cost, you will want to start a new bed right away. Regardless of which zone you live in, or what you want to grow, get Patricia Lanza’s “Lasagna Gardening” book. It will educate and inspire you.


View all my reviews

Friday, March 29, 2013

Neonicotinoids

Would you eat a vegetable that you knew contained poison? It had been bred to kill. Would you serve it in your dinner salad?

Regardless of your answer, the sad truth is, you probably already have. Farmers are now using a poison derived from nicotine, neonicotinoids, to kill pests. But this is not a spray or a powder that is administered topically to the plant. Instead, this is a systemic pesticide that is bred into the plant. The farmers buy this genetically modified seed, because it saves them money on purchasing and applying topical pesticides. The neonicontinoids have a long life span, easily months long, but as we’ve seen with herbicides like Grazon, it could persist in compost for years. The idea behind using this new form of pesticide is that it can’t wash off in the rain, or degrade in the sun. It is there, within the living plant. And when an insect comes along for a snack, they’ll find their food has been poisoned, and they will die.

So I can see why farmers would find this new form of pesticide beneficial. What I don’t understand, is why anyone that wants to eat fresh food would allow it to exist. If this poison kills insects when they eat it, what is it doing to us when we eat it? Apparently, this question never occurred to the EPA, who granted some neonicotinoids conditional approval without extensive research or testing. A group of beekeepers, environmentalists, and consumer groups recently sued the EPA for this decision, saying the association exceeded it’s authority.

But speaking of beekeepers brings me to the second prong of how these embedded pesticides could end up drastically reducing our supply of safe food. It turns out that Colony Collapse Disorder is not even close to being treated or healed. Beekeepers are reporting the greatest bee die offs ever over the course of the last 12 months. Many are blaming the toxic soup of herbicides, pesticides and fungicides that are now our nation’s farms. And neonicotinoids are a major culprit to bee deaths.
The pollen on these GMO plants are full of poison. Bees are bringing this poisonous pollen back to the hive and making toxic honey from it. Over the course of the year, especially in the cold months, bees and bee larva eat this toxic honey and it kills them. They are dying by the billions. Many of the top bee keepers in the country are experiencing hive deaths of over fifty percent. If we kill off all of our bees with our poisonous produce, we won’t have to worry about how much pesticides are in our vegetables because we won’t have any vegetables. Without bees to pollenate our plants, our crops will not be able to fruit.

Everyone wants to talk about the costs of farming and food production these days. Everything from the weather, to the seed, to the pests, to the availability of migrant labor affect the cost of our food. Everywhere we turn, we are being told why the price of our produce is going up. But no one is talking about the real price of growing poisoned food. The price per pound is important, but it pales in comparison to the expenses incurred by not having any produce to sell. Perhaps we should all consider a compromise with the insects. We’ll tolerate some pests if the bees will come back and help us grow healthy, non-toxic food.

For more information on this topic, Google “neonicotinoids” and read this article from the New York Times, http://www.nytimes.com/2013/03/29/science/earth/soaring-bee-deaths-in-2012-sound-alarm-on-malady.html?pagewanted=2&_r=2&hp.


Monday, March 18, 2013

Time for Vodquat!

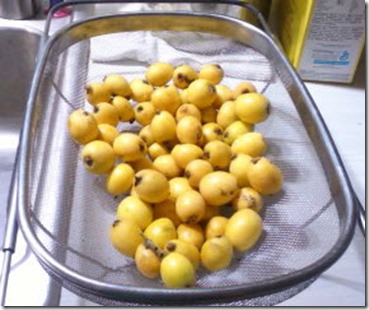
My loquat tree finally has ripe fruit on it. I’ve been waiting for this for a year. We’ve fertilized the tree, given it lots of water, and our sickly tree has grown beautiful over the last 12 months and finally has a good harvest of loquats on it.

031813 loquats

I love loquat fruit. When it’s ripe (golden orange fruit) it has a sweet, tropical flavor. If it is slightly under-ripe (dark yellow) it tastes like a sweet/tart candy. The fruit’s skin is a little fuzzy, like a peach, and it has a pit of one or two seeds. Don’t eat the seeds! They contain cyanide. Swallowing one or two is fine, but don’t go eating a handful. Do, however, save the seeds, because they have a particularly delicious use.

Vodquat.

Vodquat (my name for this loquat-seed liquor) is made by soaking the loquat seeds in vodka or grain alcohol. The strange thing about vodquat is that it doesn’t taste like loquats. It tastes like amaretto. The seeds have an amazing cherry aroma and impart that flavor to items it is cooked/soaked in.

I learned this recipe from Green Deane. He’s a forager in Florida, and I’ve learned a lot from him. (Check out his videos on YouTube!) Here’s Deane’s recipe for Loquat Grappa (his name for vodquat):

Soak one to two quarts of clean, whole Loquat seeds in a tight jar with a quart of vodka for one to six months. At the end of soaking time, drain the now flavored vodka and split it evenly between two fifth bottles. On the stove create sugar water by mixing equal parts of sugar and water. Heat until the sugar is dissolved. Top off each fifth with the sugar water. If you want it less sweet use less sugar, or more vodka.

I recommend waiting a month or two after finishing the vodquat with the sugar water before tasting. This will give it time to meld all the flavors together. And its true, the longer you soak the seeds, the more flavor your vodquat will have.

03181113 Vodquat Recipe

On a final note, vodquat makes a great gift. My family looks forward to getting a small bottle of home-made amaretto every year at Christmas. It’s a great cold weather treat, and it tastes all the better for having made it yourself. If you don’t have loquat trees on your property, keep an eye out for them while you are driving around town.

Loquat Tree

If you live in Florida, you are likely to drive by a tree or two no matter where you are going in the state. I have asked my friends to collect loquat for me from their trees and neighbors. Most people with loquat trees have more fruit than they know what to do with. So ask around, and I am sure you will be able to acquire enough loquat seeds to make plenty of vodquat for holiday gift-giving.


Saturday, March 16, 2013

Seasons Keeper

TWITTER logoFor the last couple of years now, I have been working on a better way to store and organize my seeds. Last year I attempted a storage notebook system, and I wrote about it here: http://backtourbannature.blogspot.com/2012/01/seed-organization.html.
That system worked for about a month. It was hard to get the seed packets back in the card holders, and as time went on, the open seed packets deteriorated and leaked seeds.
I decided that this cannot stand. I had seeds rolling around all over the place. I spent a week collecting the seed packets from all their hidey holes and did a massive accounting of what I had.
I am organized by nature, and tools like MS Excel only feed my desperate need to file and categorize. I listed all of the seeds that I had in an Excel spreadsheet and found that I had purchased several duplicates because I didn’t know what I had. Then I looked at that list and decided I would log all of the cultivation information from the seed packets so that I could do away with saving those packets forever. Now I was really getting into it. I added columns for seed source, ID#, cost, date of planting, potential harvest date, season, garden notes, etc. Now I really had something. I could use the spreadsheet to plan each seasons of planting, log when I planted, and schedule on my calendar when to harvest. The days of keeping the seed packets for their information was over!
Seasons Keeper Catalog sill
But if I am not keeping the paper seed packets, how am I storing the seeds? I knew I needed something that was compact, easy to use, and stored the seeds in airtight, freezer-proof containers. I did some research with manufacturers and came up with a storage vial organizer system.
single vial
case spread open
SK Case in Protector
I’ve taken my invention around to seed swaps and showed it to some fellow gardeners. I’ve received a lot of positive feedback about the system, and I had several people ask me to make them one as well. So I’ve decided to Kickstart my invention so that I can offer it to as many people as want it.
Seasons Keeper on Kickstarter
If you aren’t familiar with Kickstarter, it is a website where entrepreneurs can raise money through crowd sourcing to start their projects. Projects only get funded if they raise all of their goal amount. I’ve posted my project on their website and have listed nine backer levels with some great rewards.
If you have ever wished for a better way to keep your seeds, I encourage you to visit my Kickstarter and back my product. You can get a Seasons Keeper organizer, storage vials, and customizable electronic catalog for a pledge of just $30. And you will receive your reward by the end of May (in time for spring planting).

Thursday, February 28, 2013

My Garden’s Been Poisoned!

No joke, my garden has been poisoned. And as far as I can tell, I have Dow Chemical to ultimately blame.

I live in Florida and our ground is just sand. I have to amend and create my own garden soil. So I compost, add fish emollient, and pick up loads of horse manure from a local farm.

A couple of months ago, my neighbors and I got a load of manure from the horse farm to use in our spring beds. We have been doing this for years with great success. We pick up a trailer load of partially composted horse manure, bring it home, finish composting it, and then use it as the soil in our garden beds. Well, the manure has been composted, and we began filling our beds with it.

I used the new compost in a bed that currently is half full of greens. I spread the compost in the empty half of the bed and direct sowed Wando Peas, broccoli, and carrots. The peas came up first and looked a little weak, but it’s been cold and dry, so I chalked it up to that. The broccoli came up and looked good. The carrots never even sprouted. As the peas grew, it became obvious that something more than dry weather was the problem.

Herbicide Poisoned Pea Plants

At that same time, my Feb/March issue of Mother Earth News arrived. In it was an article called, “Killer Compost Update: Herbicide Damage Still a Major Problem.” The picture that was displayed with the article caught my attention because it looked just like my peas.

022813 burned pea plant 3

The article explains that two Dow AgroSciences herbicides (picloram and clopyralid) are being found in composts and animal feeds. My heart sank. I had the terrible suspicion that my new compost was contaminated.

I called my neighbor to see if she had used the new compost yet, and if so, what her results were. She walked me over to her bed of English Peas. They were all dead or burned and wilted. We had become the victims of Killer Compost.

The horse farm does not use herbicides themselves, so they were introduced either through the hay or through the Purina horse feed. Either way, our ton of compost is toxic and we have no way of knowing if any alternative sources of manure will be herbicide-free. If the herbicide was introduced through the Purina feed (as Mother Earth explains is a very good possibility) we will have to find an organic farm that feeds only organic grains, grasses, and hays.

There is no remediation for picloram or clopyralid once it has been introduced. It will remain active in the soil for years. My neighbor and I have to dig up our beds and remove all of the toxic compost. What we do with it then is up for debate. It survives digestion and hot composting, so there doesn’t’ seem to be any way to break it down. We will either spread it on walkways or burn it.

Mother Earth is calling for these persistent herbicides to be outlawed entirely before it becomes impossible to grow organically. Please join their fight with me. Write to Richard Keigwin, director of the EPA’s Special Review and Reregistration Division at keigwin.richard@epa.gov to let him know about your concerns.


Thursday, February 21, 2013

Seed Swap

One of the great things about seeds is that they are so easy to save and swap with others. I love trading seeds with my friends and neighbors. It allows us to broaden our plant varieties without stretching our budgets.

I recently got the opportunity to swap with a friend of mine before he left for a vacation. He had already started the seeds, so instead of baggies of seeds, I got two trays of seedlings! The first tray had bush beans and English peas. I just started peas in my beds, so I am really looking forward to getting these seedlings in there and having some succession harvesting ahead of me.

022113 sprouts 1

The second tray had watermelon, tomatoes and cucumbers.

022113 sprouts 2

Clint was afraid that these seedlings wouldn’t survive his absence while he is on vacation. So I swapped him seeds for his seedlings that he could plant when he returns. I gave him some corn, ground cherries, peppers, and Dragon Tongue bush bean seeds.

Seed saving and swapping has a long and important history. It has been vital to the preservation of heirloom varieties of seeds. Heirlooms are necessary because they represent culturally diverse and endangered crops and agricultural freedom. A diverse seed catalog is a cornerstone of food security. If growing seed that has been selected for your region, soil, weather, and superior flavor is important to you, then you should definitely consider taking part in this long held tradition.

Seed saving and swapping is the best way to break the hold that Mega Corps like Monsanto and Dow have on our agriculture. To further support conserving and promoting heirloom seeds, consider joining the Seed Savers Exchange. Not only do they do great work to support an enormous variety of ancient seeds, but they also offer members fantastic educational opportunities and a good discount on seed purchases.

So start talking to your friends and neighbors. Find out what kind of seeds they have laying around the house. Seed swaps are fun and economical, and they are good for plants too.

Blogger Labels: Swap,friends,tray,bush,English,succession,corn,Dragon,Tongue,history,preservation,Heirlooms,freedom,catalog,food,region,tradition,Mega,Corps,Monsanto,agriculture,Exchange,Find,plants,Savers,members,neighbors,peas,heirloom

Sunday, February 17, 2013

Seed Starting for Spring 2013

Well, its nearly spring here in Florida, and with days that have highs in the 80s, some might contend that spring has already sprung. We have at least on quick freeze likely to hit us this weekend, and then I think we will be officially on a warming trend. And if that’s true, then there is no time like the present to get my spring seeds started!

Last year I bought a tool to make my own paper seed starter pots. I blogged about it here:Time to start seeds? 

Yesterday I had an afternoon free and began making my fully biodegradable paper pots and starting some seeds. Here’s what I have done so far.

  • I made 64 little newspaper pots. I love this method because it recycles my junk mail and makes pots that won’t bind root systems.

021313 paper pot

  • Then I planted the following organic heirloom seeds:

021313 Seed Starts 1

    • 4 Kerala Red Amaranth
    • 4 Love Lies Bleeding Amaranth
    • 2 India Jwala hot peppers
    • 2 Tam Jalapeno peppers
    • 4 ground cherries
    • 4 Dragon Tongue Beans
    • 4 Mammoth Sunflowers
    • 4  Moonwalker Sunflowers
    • 4 Burgundy Okra
    • 4 Purple Beauty Peppers
    • 4 Sweet Red Stuffing peppers
    • 4 Friariello Di Napoli peppers
    • 4 Amy’s Apricot tomatoes
    • 4 Homestead tomatoes
    • 4 Black Cherry tomatoes
    • 4 Yellow Wonder Strawberries
    • 4 Jewel Nasturtiums

021313 Seeds Starts 2

A lot of these seeds are new to me, so it will be a real experiment to see if I cultivated them correctly. I am really excited to be growing Amaranth this year. I have been reading about it’s super-food status, and I love the idea of growing something that I can eat the leaves and harvest grain. I plan to devote the bed I have in the front yard to the Amaranth because I think it will be pretty enough to proudly display.

I am keeping the seed starts in my little 3-Shelf greenhouses while it is still cold at night. I plan to do another 64-100 more starts to get me through spring and summer. I’ll update when I get those going too.

Isn’t this the best time of year? Don’t you just love all of the possibilities? Every one of these little pots of dirt represent a potential harvest to me. And I am so excited to find out if my investments will profit. It is amazing to think that these small trays will develop into whole large beds of plant life in the coming months. I can’t wait to see them all grow up!

Windows Live Tags: Florida,trend,Last,tool,paper,starter,Time,afternoon,Here,newspaper,method,Kerala,Amaranth,Love,Lies,India,Jwala,Jalapeno,Dragon,Tongue,Beans,Mammoth,Sunflowers,Moonwalker,Burgundy,Okra,Purple,Sweet,Friariello,Napoli,Apricot,Homestead,Black,Cherry,Wonder,Strawberries,Jewel,Nasturtiums,food,status,grain,yard,Shelf,possibilities,dirt,investments,life,systems,greenhouses,tomatoes
Blogger Labels: Florida,trend,Last,tool,paper,starter,Time,afternoon,Here,newspaper,method,Kerala,Amaranth,Love,Lies,India,Jwala,Jalapeno,Dragon,Tongue,Beans,Mammoth,Sunflowers,Moonwalker,Burgundy,Okra,Purple,Sweet,Friariello,Napoli,Apricot,Homestead,Black,Cherry,Wonder,Strawberries,Jewel,Nasturtiums,food,status,grain,yard,Shelf,possibilities,dirt,investments,life,systems,greenhouses,tomatoes

Saturday, March 3, 2012

Garden Bed planted March 1st

It’s felt like the last 30 or 40 days have sped by in fast forward motion. Spring sprung and hightailed it toward summer before I even had all of my seeds started. I’m not sure what this unusually warm and dry weather will mean for my garden in the high summer months of July and August, but for right now it means I have had to speed up my efforts to get the garden growing.

In late February Max built me a raised bed and I dug it out, weeded, and laid some cardboard down to inhibit weed growth.

Cardboard bottom layer of bed 1

Then I filled the bed with tons of composted cow manure.

layer of cow manure on bed 1

On top of the cow manure I added some locally-sourced, composted horse manure. The horse manure helps to keep the soil moist in addition to adding some great fertilizer to the mix.

Bed 1 filled w.manure

Once that was all complete, I was ready to plant my most advanced seedlings. From the top of the above picture to the bottom, I planted rows of Cherokee Purple tomatoes, Dragon Tongue beans, Shallots, Sweet Yellow Onions, Purple Tomatillos, and Green Cowhorn and Burgundy Okra.

These seedlings took off immediately upon being planted in the bed. I had blossoms on my dragon tongue beans only days after getting them in the raised bed.

Blossoming Dragon Tongue Beans

This first bed took off so well, we’ve decided that we need a second one to build for more beans, peppers, eggplant, etc. I’ll have a post up soon about the next bed.

Monday, February 20, 2012

Grow It Forward

I just won free heirloom seeds from Baker Creek Seed Company in the Your Garden Show "Grow It Forward" contest. I can't wait to get my seeds and find out what else will be going in my garden!

Monday, February 6, 2012

I'm a Bad, Bad Blogger

Okay, I am WAY behind on this blog, so here’s a crazy long catch-up post:

I moved from South Florida to North Florida on January 14th.  I brought the seedlings that I had started in the beginning of January (onions, cabbages, and tomatoes), my jalapeno pepper plants, black night pepper plants, mint, orchids, and chives. They all seem to be happier the new, somewhat cooler climate.

 On January 18th I managed to break the well. Not the actual hole in the ground, but the PVC pipe that carries water from the well to the house. Panic doesn’t begin to describe how I handled that situation. Luckily for me and my boyfriend, I was able to call a friend who walked me through purchasing this magic blue stuff, and applying it to the pipe and coupling.  As of this posting, the seal is still holding, and Max says that now that he knows I have plumbing skills, he’s got a long list of chores waiting for me.

Here’s a pic of my masterful handiwork.


So Max and I have already had some winter veggies started in our garden.

Bok Choy, Leeks, & Radicchio
We planted this Baby Bok Choy from seed in early November and have been eating from it since late November. What a great winter veggie! We love the Ching Chang Bok Choy. It grows fast, is hardy, and very tasty.
Bolting Bok Choy
Unfortunately, our unseasonably warm weather has caused the Bok Choy to bolt and the Radicchio to slow its growth into peppery red lettuce heads. But I’m not complaining, because it still tastes great.

Radicchio
We got so much out of our Bok Choy seeds that we decided to try to squeeze in a second batch of winter veggies. I planted more Bok Choy, Red Cylindra Beets, Kohlrabi, Pink Beauty Radishes, Daikon Radishes, Japanese Mustard, and European Mesclun Mix salad greens.  I planted this on the 21st of January, and as you can see, we have some good looking sprouts happening now.

Bok Choy Sprouts

Pink Beauty Radishes

Japanese Mustard Greens

European Mesclun Mixed Greens
On February 2nd my best friend, Kaurie, and I decided that the warm weather wasn’t going to abate, and we’d better just go with it and start our spring seeds. We used our paper pot maker tools


and made a TON of little paper seed pots. We learned that after filling the pot with soil, you should use the tool to compress the soil in the pot. This will help the stability of the pot, and give the seedling something to grow against.

Kaurie's Seed Pots

My Seed Pots

Here’s a list of what seeds I planted:

§         Dwarf Jewel Nasturtium (x1 pot)

§         Dwarf Peach Melba Nasturtium (x1 pot) *These did really well last year. This year we are planting more nasturtiums for both salad and butterfly garden use.

§         Purple Tomatillos (x4)

§         Yellow Wonder Strawberries (x4)

§         Cherokee Purple Tomatoes (x3)

§         Amy’s Apricot Tomatoes (x3)

§         Red Currant Tomatoes (x2)

§         Yellow Brandywine Tomatoes (x2)

§         Black Giant Tomatoes (x3)

§         Black Cherry Tomatoes (x3) *These did well for us last year, so we are replanting them from our saved seed this year. They were our favorie tomatoes from last year!

§         Pineapple Ground Cherries (x2)

§         Regular Ground Cherries (x2) * I didn’t have luck with these last year, but my mom (in Orlando) did. They were so yummy I have to try to grow them again. They grow wild in Florida, so I feel pretty confident we can get them to grow.

§         Purple Beauty Peppers (x3) *Had one plant of these last year and enjoyed them so much we replanted more of them this year from our saved seed.

§         Japanese Eggplant (x1) *We planted this last year and it got a late start but it never died out. We have a large plant now that is ready to flower soon. So since we already have one eggplant ready to produce, I only planted seed for two more.

§         Florida Eggplant (x1)

§         Burgundy Okra (x4) *Planted this last year late in the season and it was wonderful! We bemoaned that we started it so late, because it was a real winner. Very tasty and beautiful to look at too.

§         Fife Creek Cowhorn Okra (x3) *Planted this late last year and promised ourselves to start it early this year.

§         Sweet Red Stuffing Peppers (x2)

We may have gone a bit overboard on all of this, but I just couldn’t restrain myself.

On both January 15th and February 5th Max and the boys went out and procured some composted horse manure from a local stable. We now have two piles like this ready to be spread out in our upcoming raised beds. Hopefully these piles of horse shit will make my dream of delicious and sweet melons a reality.
Mostly Composted Horse Manure
And while I was at it, I impulse purchased these strawberries and cat nip plant at Ace Hardware on February 2nd.  Can you ever have too many strawberry plants? I don’t think so.


And lastly, though this isn’t technically part of our garden, our Red Bud tree is blooming. Seems too early for that sort of business, but I’ll enjoy it any time it feels like blossoming.


Thursday, January 12, 2012

It's GROWING!!!

This is just a quick post to update the growth of the seedlings. The tomatoes have all sprouted and the cabbages are shooting up like weeds. So, 10 days after planting the seeds, everything is growing fast and strong except the Natal Plums. I'm not sure how long germination is supposed to take for those.  Perhaps they are just slow to pop, or maybeI didn't dry or store the seeds correctly. I'm not ready to give up on them yet though.

Leggy Seedlings
Another thing I have learned about using the paper pots is that I should have used the pot making tool to compress the soil in the pots. I think the soil is too loose. Hopefully, that won't negatively affect the growing of the sprouts. Next time, I will fill the pots with soil, and use the pestle to press the soil down into the pot. Live and learn, that's what this garden is all about.

I will be packing these seedlings and my other straggly plants into a large moving truck and shipping them from    hot and humid Palm Beach Gardens, Florida to the much cooler East Palatka, Florida. I'll keep the seedlings indoors until it warms up enough to transfer them to our Spring garden. Once I get settled up there, I will be starting a lot more veggies from seed, as well as reading up on some gardening and seed saving methods. Stay tuned for the updates on that and a lot more in the coming weeks!

Tuesday, January 10, 2012

Sprouting Update!

Just a quick update here: the tomato seeds have all started to sprout. They are teeny tiny, but they are growing. Now all that is left un-sprouted is the Natal Plum. I am wondering if I did not dry out the seeds enough or something. I'll post pics of the seedlings soon.

Monday, January 9, 2012

We Have Sproutage!

I came home from work on Friday night (1/6/12) to find that I had sprouts springing up from most of my newspaper seed pots. The rapini, both cabbages, and leeks all had tiny green shoots poking through the soil. Three days later, I still don't having anything happening in the tomato or Natal Plum pots, but I think they might just be a little behind. The weather has been unseasonably warm lately. There is a high of 78 degrees today. I'm not sure how that is affecting germination, but as always, I'm hoping for the best.

Sprouts!
The tomato and pepper plants from last summer are loving the warm temperatures. I kept thinking I needed to tear out the tomato plant and start fresh in spring, but now it is covered in little yellow blossoms. And the pepper plants have been going to town! I have red stuffing peppers and jalapenos growing, and I think some purple beauty peppers are getting ready to form as well. I am going to try to keep these go-getters through the winter so we can enjoy some winter/early spring tomatoes and peppers.

One word of caution on the paper seed pots: they are delicate. I checked on the tray of pots on Saturday morning to find that one of my cats had tramped through there.  One of the pots that got stepped on was split down the side. You can see it in the forefront of the picture. If you have curious critters or small children, this might be something to consider when deciding to use the paper pot method. But I just stood the pots back up, re-shaped them a bit, and everything seems no worse for the wear. 

Wednesday, January 4, 2012

Seed Organization

I can’t be the only one with this problem – Storing and organizing left over seed. I’ve tried several different methods over the last year, none of which were terribly successful. Initially, I taped the seed packets closed and put them in an old school-supplies box. This was adequate until I needed back in those seed packets. Every time I had to cut the tape to re-open the seed packets, the packet itself degraded a little more. Also, there was no organization to the box. When I needed a specific packet, I had to sort through everything in the box to find it.

Next I put the different varieties of seed packets in their own labeled baggies. I had a plastic sandwich bag for all my different tomatoes, eggplants, peppers, etc. This helped with the organization, but the seed leaked out of the seed packets and soon I had bags of miscellaneous tomatoes, eggplants, and peppers.
So here’s my latest attempt:

Seed book
I tri-folded the seed packets and slid them into clear plastic business card holder sheets. Each sheet holds 10 seed packets. I can actually read the seed packets, and so far, I don’t think that any seed has been able to escape the packets. The image above is my test run. I am going to take it on a trip to share with some gardening friends. If the seeds all stay put, I will put my other (20-30) seed packets in the protector sheets and organize it so that each sheet is dedicated to a plant type (i.e.: berries, carrots, peppers, tomatoes, greens, etc.).I also put white ruled paper behind each sheet and plan to catalog planting /germination notes for each seed I plant in 2012. Hopefully this seed catalog/garden diary will be the answer to my seed storage and organization prayers.

If anyone out there has a good method that works for them, I would love to hear about it. I’ll even post it here (with your permission) to share with others.

Tuesday, January 3, 2012

Time to start seeds?

I took up gardening on a small scale last year. I had many failures, but I also learned a lot from the experience. One of the things I decided to do differently this year is to start the seeds sooner. Here, in Florida, we have a very long growing season, and I missed out on growing some of the cooler-weather vegetable varieties because I didn't start the seeds soon enough. Not so in 2012, I vowed.

So despite the temperature dropping at a steeper rate than it has all season, I decided to get a jump on a few of the cool-seasons veggies. Last year I used the Burpee seed-starting trays to start the seeds. The trays worked very well, but I found that it became difficult to find the trays after the first month of Spring. Instead of being dependent on Burpee this year, I purchased a paper seed pot making tool.

http://www.reuseit.com/store/doityourself-plant-potmaker-from-newspaper-p-3092.html

Yesterday afternoon, as the cold, windy weather was starting to blow in, I made 18 paper pots out of some newsprint junk mail. Not only is the pot-maker made of wood, and therefore completely recyclable, but it also helps the home gardener recycle some of the paper in her home. It's a win-win! I have also read that these paper pots are better for the growth of the seedling, since it doesn't restrict the roots the way the seed starter mesh soil pods can do.

The act of planting seeds on the coldest day of the year seems like an act of extreme hope. It's hard to believe that those tiny, dry seeds will open and grow into plants that can feed us all season. Therefore, I think it's a perfect way to bless the new year.

My Seed Pots


I sowed seeds for leeks, Nero di Toscana cabbage, Coer De Boeuf Des Vertus cabbage, Black Giant Tomatoes, Rapini Broccoli, and Natal Plums. The Natal Plums are a total experiment. I discovered this plant on an urban foraging class of Green Deane's (www.eattheweeds.com). It is a thorny bush type of plant that produces wonderfully scented white blossoms and delicious, sweet/tart flavored, fig-sized "plums" all year long. I picked a dried fruit off of the plant during the class and brought it home with me to harvest the seeds. My fingers are crossed that I can get a couple of these going in my yard. Visions of Natal Plum preserves and dried plums have captured my imagination.

Natal Plum


Everything except the tomatoes and Natal plums are cold-tolerant, so I'm hoping to have them producing before the afternoons get warm. The tomatoes I will keep indoors for as long as possible. I just want to get a few of them started early so that I can get the most out of them all spring and summer long.

If anyone from the South has any advice or recommendations for a newbie just starting to garden in Florida, I would welcome it in the comments of this blog. I scour the internet for helpful tidbits, but most gardening advice doesn't pertain to the extreme South. Thanks for the help, and I'll post an update soon.