Friday, October 11, 2013

Fun Little Homesteading Book

Made from Scratch: Discovering the Pleasures of a Handmade LifeMade from Scratch: Discovering the Pleasures of a Handmade Life by Jenna Woginrich
My rating: 3 of 5 stars

“Made from Scratch” is a charming memoir of the author’s journey toward self-sufficiency. Jenna Woginrich reminds me a lot of myself. She is constantly trying to learn new skills and pick up new hobbies. Though I have no interest in sled dogs or sheep keeping, I found that her book had some wonderful stories full of warmth and discovery, and some excellent project suggestions and references.

This is a great primer for those who are just starting to think about getting some country skills. It is a fun and inspirational read, and it offers a lot of resources for people looking to get started. From baking your own bread or playing your own music, to raising fiber animals and back yard chickens, “Made from Scratch” has it covered. You will learn both from Woginrich’s victories and from her mistakes. Even if you don’t ever plan to do most of what is discussed in the book, the writing is so engaging that it is a pleasure to read.

I enjoyed this book and plan to pick up Woginrich’s other book, “Barnheart” as well.


View all my reviews

Tuesday, May 21, 2013

Book Review: Twinkie Deconstructed

Twinkie, Deconstructed: My Journey to Discover How the Ingredients Found in Processed Foods Are Grown, Mined (Yes, Mined), and Manipulated Into What America EatsTwinkie, Deconstructed: My Journey to Discover How the Ingredients Found in Processed Foods Are Grown, Mined (Yes, Mined), and Manipulated Into What America Eats by Steve Ettlinger
My rating: 3 of 5 stars

“Twinkie, Deconstructed” is a book with one, horrifying central theme: all the ingredients in a Twinkie have a single source – petroleum. The book became painfully repetitive as it described how once again, the ingredient was made from fossil fuels. Over and over again this book describes processes of heat and extraction that result in the production of the chemically-laden “food” that makes a Twinkie.

I had expected the ingredients in Twinkies to be a chemical horror, but what really brings this book home is how Ettlinger breaks down the ingredients and shows the reader how some of these ingredients are used in the home. Ever use baking powder or bleached all-purpose flour? Then you too have a cupboard full of highly processed foods. The process for imitation vanilla is amazing.

Though I have not had a Twinkie in thirty years, this book made me think about all of the other foods that I eat that have similar ingredient lists. These petroleum-based ingredients can be found in practically any processed food you might encounter – everything from pasta sauces to lunch meats.

I gave this book thee stars because I did find the format repetitive, though that is not entirely the fault of the author. And the repetition did serve to drive home what is really in our food. I also had just finished the book “Salt, Sugar, Fat” which does a better job of writing about a similar thing. I felt that Ettlinger did not press his sources enough regarding the health and safety of the ingredients he was researching. That being said, “Twinkie, Deconstructed” was a real eye-opener. If you are interested in the chemistry of food, or food origins, this will be a great read for you.


View all my reviews

Wednesday, May 1, 2013

Salt Sugar Fat: How the Food Giants Hooked UsSalt Sugar Fat: How the Food Giants Hooked Us by Michael Moss
My rating: 4 of 5 stars

“Salt Sugar Fat” has ruined grocery shopping for me. I’ve never been a fan of highly processed foods. I am not one to throw Kraft Cheesy Skillets, or Lunchables into my grocery cart. I know that processed foods are bad for you and full of empty calories. But this book took that point of view and radically expanded it.

So much of what we think of as “food” contains little to no actual food! And it is a worse problem than just obesity. These “foods” contribute to high blood pressure, organ failure, heart failure, altered taste buds, and even cancer! Manufacturers of these products know their dangers and don’t eat them. I wouldn’t eat a meal at a fancy restaurant that the chef wouldn’t touch, so why would I eat a meal in a box that the CEO of Kraft wouldn’t touch?

“Salt Sugar Fat” is broken up into three sections that address each ingredient’s role in processed foods. First is Sugar, and this section is a real eye opener. We all know about the sugars involved in sodas, but what was really frightening to me was the secret sugars that are added into all manner of foods in order to mask other chemical “off” flavors. This is the section that first introduces the concept of the “Bliss Point”. According to Moss’ research, people’s bliss points for sugar are higher and higher due to early exposure to high sugar foods in infancy. If you grew up drinking soda and other sweet drinks, you are doomed to crave higher and higher sugar contents in your foods for the rest of your life.

The Salt section has similar information to the sugar section. People are developing higher and higher tolerances to salts in their foods. Even children, who normally don’t like a lot of salt, are being trained by processed foods to crave it. Again, salt is added to EVERYTHING. It provides better mouth feel for a lot of products, preserves products, and masks metallic and other off flavors.

I was ready to be hit hard by the fat section, and I was not let down. Fats are not going away from processed foods. Fat is essential to their success. Moss’ research shows that when salt and sugar are combined with fats, our brains/bodies do not identify how much fat we are ingesting. Basically, the key components of processed foods work together to turn off our natural satiety. That’s terrible news for the consumer, but great news for processed food manufacturers.

Don’t read this book if you aren’t prepared to go to the grocery store armed with your new found information on processed food. You will be checking the labels on everything and evaluating and translating the information therein. Nothing is as it first appears. “Low Fat” or “Diet” varieties often harbor secret stashes of extra salt or sugar that keep the calories ridiculously high. But if you are ready for some hard truths that might just save your life, get this book today.


View all my reviews

Saturday, April 20, 2013

Organic Gardening in Florida Poses Unique Challenges

Organic Methods for Vegetable Gardening in FloridaOrganic Methods for Vegetable Gardening in Florida by Ginny Stibolt
My rating: 4 of 5 stars

Florida offers gardeners unique challenges and benefits that are not generally addressed in most gardening publications. I find myself always doing a little mental math when I read about when and how to start seeds. I live in North Florida (zone 9B), and I pretty much have to plant spring crops (like English Peas) in the winter. It’s April right now, and our high temp today is 91 degrees Fahrenheit. All of my greens began bolting in February, and my window for growing cool/cold weather crops is almost too small to get anything grown to maturity. And this is in North Florida! My friends in South Florida can forget about growing a lot of common crops entirely!

I’ve been gardening for about 4 years now, and I really wish that I had discovered this book when I first started. It would have given me a great start; instead I had to learn things the hard way. Four years into it, I’ve figured a lot of the info in this book out already. It has some great information on different organic gardening methods, composting, and bed building. However, I’ve read more detailed information on these topics in other books dedicated to them.

What “Organic Methods for Vegetable Gardening in Florida” gets right is its focus on Florida specific gardening challenges. The book recognizes that Florida is unique in that there are many different growing zones in the state, and what works in North Florida will not necessarily work in Central or South Florida. It also addresses Florida’s poor soils and what can be done to amend them.

There is a large section of the book that describes Florida tolerant crops and where they grow best in the state. This section is worth the total price of the book. It is a fantastic reference for anyone gardening in the state. I can look up parsnips or peas and find out how well they grow in each section of the state, when to plant them, and how to care for them.

Though I had already read or experienced a lot of the information provided in this book, the vegetable references have earned it a place in my personal library. If you garden in Florida, this book will have valuable information for you, even if you are a skilled and experienced gardener.


View all my reviews

Friday, April 19, 2013

Fungus Among Us! Part 1– Medicinal Mushrooms

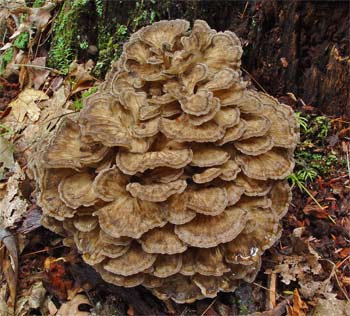
This is a second post based on classes I took at the Organic Growers School (OGS) Conference in March of this year. Two of the best classes I attended this year were Medicinal Mushrooms  and Shroomin’ Off The Grid, both taught by mushroom evangelist, Tradd Cotter. Cotter owns and operates Mushroom Mountain in South Carolina, and has made a name for himself with his work on mycoremediation and spore cultivation. If you have questions about mushrooms, this is the guy to ask!

So first I’d like to address medicinal mushrooms. Cotter’s lecture on this subject was fast and furious. He probably condensed a 3 hour lecture into an hour. There was more information than I could even absorb.

According to Cotter, many mushrooms contain antibiotic, anti-pathogenic, and some even seem to protect against cancers! For instance*:

Chanterelles – contain a cancer-fighting enzyme, are high in beta carotene and vitamin D if grown exposed to light for a couple of hours a day.


Cordyceps mushrooms – are an immune system stimulant that is frequently given to people undergoing surgery.These mushrooms are also carnivorous! They attack and eat insect pupae and the mushrooms frequently sprout out of the back of the pupae’s head. Gnarly! Some of these mushrooms can be used to kill fire ants, squash bugs, aphids, etc. Think of the gardener’s who could use this fungus! Cordyceps Ophioglossoides has been shown to stimulate adult brain cells to grow. It is being researched on its ability to reverse brain diseases like Alzheimer's.

Lion’s Mane (Hericium Erinaceus) – cook this mushroom to release a nerve tonic


Psilocybin (Magic Mushrooms) – are currently being studied at Johns Hopkins as a treatment for addiction and PTSD. Preliminary studies has shown great promise with just one dose!


Maitake – Makes a great tea and has anti-cancer properties.


Chicken of the Woods – kills e-coli bacteria and is a great treatment for fungal infections.


Wood Ear – (commonly used in hot and sour soups) These mushrooms dehydrate down to a fraction of their original size, but rehydrate almost completely. These mushrooms store well and are high in anti-coagulants.


Enoki (Velvet Foot) – is very high in anti-cancer properties.


Almond Portobello – tastes like toasted almonds when cooked and is high in anti-cancer properties.


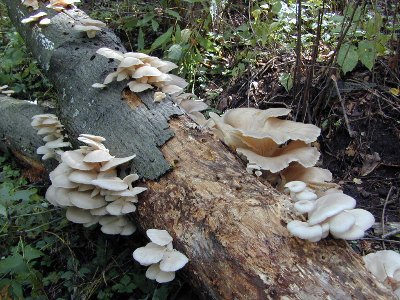
Pleurotus (Oyster) – has twice the protein of eggs, is high in psyllium, is anti-viral and anti-parasite.


Corn Smut – a corn fungal pathogen that tends to grow on Silver Queen and other heirloom varietals. This fungus tastes like a corny guacamole and can help with uterine contraction.


Turkey Tail – dried and powdered has been studied in its use to fight breast cancer. Seems to work as a preventative as well.


Reishi (Ling Chi) – is known as the Mushroom of Immortality. If this mushroom is grown in light, it is more medicinal. This amazing mushroom is adaptogenic, immune enhancing/modulating, and has ganoderic acid (for diabetics). Cotter made us some reishi mushroom tea to try and it had a pleasant earthy/chocolate flavor. This medicinal can be dried and powered or extracted.

Cotter recommends reading The Fungal Pharmacy by Robert Rogers for more information on medicinal mushrooms. If you are interested in growing your own medicinal mushrooms, check out my next posting on Shroomin’  Off The Grid!

* This information is not intended as medical advice. Do not ingest any mushrooms without assurance from a mycologist that they are safe to eat.


Friday, April 12, 2013

Lasagna Gardening

Lasagna Gardening: A New Layering System for Bountiful Gardens: No Digging, No Tilling, No Weeding, No Kidding!Lasagna Gardening: A New Layering System for Bountiful Gardens: No Digging, No Tilling, No Weeding, No Kidding! by Patricia Lanza
My rating: 5 of 5 stars

I found Patricia Lanza’s “Lasagna Gardening” to be highly inspirational. This is a gardening method that anyone can try. It is basically sheet composting inside of a garden bed, but instead of waiting for the compost to be fully processed, you can plant inside a lasagna garden as soon as it is built.

One of the keys to lasagna gardening is using the organic materials that you have on hand. I have a lot of oak leaves, grass clippings and garden waste on hand, so that is what I will be using to build my lasagna beds. Though the oak leaves can make the soil highly acidic, I’ll temper that with a dusting of wood ash that I saved from my winter fires.

There are only two things that I found as drawbacks to this book. The first is Lanza’s dependence on using large quantities of Sphagnum moss. This is a product that takes hundreds of years to grow back, so it is practically unsustainable. I do not want to use Sphagnum in my gardens at all. I am going to find an alternative to the moss that is a renewable resource. I am considering using a combination of Spanish moss (which I have tons of in my yard) and coconut coir. I’ve used the coir in the past as part of a potting mix. It holds water similarly to the Sphagnum moss and it is highly renewable, so I think that’s a good alternative.

The second is her recommendation of hybrid plants. I don’t have a moral argument against using hybrids, but you can’t save seed from hybrid plants, so you can’t build a series of garden plants that are adapted perfectly to your garden if you are using hybrids. It’s a small complaint, but I would have appreciated more recommendations of heirloom varieties.

Other than that, this book is very thorough. Whether you want to grow vegetables, herbs, flowers, or even start a container garden, Lanza has you covered in this book. She lays out the simple steps to building a lasagna garden bed, and then goes into how to care for different kinds of plants in the new bed(s). The method is so simple and low-cost, you will want to start a new bed right away. Regardless of which zone you live in, or what you want to grow, get Patricia Lanza’s “Lasagna Gardening” book. It will educate and inspire you.


View all my reviews

Monday, April 8, 2013

Composting: Not Just For Kitchen Scraps!

The Complete Compost Gardening GuideThe Complete Compost Gardening Guide by Barbara Pleasant
My rating: 5 of 5 stars

This is the only book on composting you will ever need. It discusses many different composting methods, style, and tools, and it ends on uses, cover crops, and green mulching. It uses the real, personal experiences of the authors, fantastic step-by-step photos and diagrams, and some great recipes and info graphics.

I got a lot of new ideas and plans from this book, and I can't wait to get started on my new composting projects. I checked this book out of the library, but it is such a fantastic resource, that I will soon be purchasing my own copy.

View all my reviews

Saturday, April 6, 2013

Turmeric Time!

One of the fantastic classes available at the Organic Growers School (OGS) this year was on growing turmeric. I wasn’t able to attend this class, but my neighbor did, and she was greatly inspired by it. Turmeric is very medicinal, and it is starting to be recognized for its many health benefits. Here’s an info graphic that only touches on some of the amazing qualities of turmeric.

turmeric chart

My neighbor and I have been talking about growing our own medicinal gardens for a while now, and this turmeric class clinched it. It was just too great a plant to ignore.
Turmeric is a temperamental, tropical plant that hates the cold. Luckily, we live in Florida and our weather is perfect for growing this root. We ordered some organic turmeric root rhizomes (see www.eastbranchginger.com), organic coconut coir for a growing medium, and black plastic 5 gallon grow bags.

2 pounds of Turmeric rhizomes

The coir comes in 5kg compressed blocks. After rehydrating the blocks, the damp coconut coir filled my wheelbarrow. We added a couple of gallons of our home grown organic compost and some gypsum pellets.

Coconut coir & compost media

Once we had our growing medium well mixed, we filled our grow bags. Turmeric needs about 10 inches of soil below the rhizomes. I filled the bags and measured to make sure that each was at least 10 inches deep.

Turmeric grow bags

Then we placed 3 turmeric rhizomes in each bag. That is probably one more rhizome than is best for the size of our bags, but we are not sure that all of the rhizomes will sprout. We simply placed the rhizomes on top of the growing medium.

rhizomes in pot

Then we sprinkled less than an inch more growing medium over the rhizomes. Now we wait. It takes about three weeks for the rhizomes to sprout, and about nine months for turmeric root to be ready for harvest. We are hoping to turn our four pounds of rhizomes to 40 pounds of commercially viable turmeric root in late December/early January. I’ll keep you all posted on my crop’s progress.


Friday, March 29, 2013

Neonicotinoids

Would you eat a vegetable that you knew contained poison? It had been bred to kill. Would you serve it in your dinner salad?

Regardless of your answer, the sad truth is, you probably already have. Farmers are now using a poison derived from nicotine, neonicotinoids, to kill pests. But this is not a spray or a powder that is administered topically to the plant. Instead, this is a systemic pesticide that is bred into the plant. The farmers buy this genetically modified seed, because it saves them money on purchasing and applying topical pesticides. The neonicontinoids have a long life span, easily months long, but as we’ve seen with herbicides like Grazon, it could persist in compost for years. The idea behind using this new form of pesticide is that it can’t wash off in the rain, or degrade in the sun. It is there, within the living plant. And when an insect comes along for a snack, they’ll find their food has been poisoned, and they will die.

So I can see why farmers would find this new form of pesticide beneficial. What I don’t understand, is why anyone that wants to eat fresh food would allow it to exist. If this poison kills insects when they eat it, what is it doing to us when we eat it? Apparently, this question never occurred to the EPA, who granted some neonicotinoids conditional approval without extensive research or testing. A group of beekeepers, environmentalists, and consumer groups recently sued the EPA for this decision, saying the association exceeded it’s authority.

But speaking of beekeepers brings me to the second prong of how these embedded pesticides could end up drastically reducing our supply of safe food. It turns out that Colony Collapse Disorder is not even close to being treated or healed. Beekeepers are reporting the greatest bee die offs ever over the course of the last 12 months. Many are blaming the toxic soup of herbicides, pesticides and fungicides that are now our nation’s farms. And neonicotinoids are a major culprit to bee deaths.
The pollen on these GMO plants are full of poison. Bees are bringing this poisonous pollen back to the hive and making toxic honey from it. Over the course of the year, especially in the cold months, bees and bee larva eat this toxic honey and it kills them. They are dying by the billions. Many of the top bee keepers in the country are experiencing hive deaths of over fifty percent. If we kill off all of our bees with our poisonous produce, we won’t have to worry about how much pesticides are in our vegetables because we won’t have any vegetables. Without bees to pollenate our plants, our crops will not be able to fruit.

Everyone wants to talk about the costs of farming and food production these days. Everything from the weather, to the seed, to the pests, to the availability of migrant labor affect the cost of our food. Everywhere we turn, we are being told why the price of our produce is going up. But no one is talking about the real price of growing poisoned food. The price per pound is important, but it pales in comparison to the expenses incurred by not having any produce to sell. Perhaps we should all consider a compromise with the insects. We’ll tolerate some pests if the bees will come back and help us grow healthy, non-toxic food.

For more information on this topic, Google “neonicotinoids” and read this article from the New York Times, http://www.nytimes.com/2013/03/29/science/earth/soaring-bee-deaths-in-2012-sound-alarm-on-malady.html?pagewanted=2&_r=2&hp.


Monday, March 18, 2013

Time for Vodquat!

My loquat tree finally has ripe fruit on it. I’ve been waiting for this for a year. We’ve fertilized the tree, given it lots of water, and our sickly tree has grown beautiful over the last 12 months and finally has a good harvest of loquats on it.

031813 loquats

I love loquat fruit. When it’s ripe (golden orange fruit) it has a sweet, tropical flavor. If it is slightly under-ripe (dark yellow) it tastes like a sweet/tart candy. The fruit’s skin is a little fuzzy, like a peach, and it has a pit of one or two seeds. Don’t eat the seeds! They contain cyanide. Swallowing one or two is fine, but don’t go eating a handful. Do, however, save the seeds, because they have a particularly delicious use.

Vodquat.

Vodquat (my name for this loquat-seed liquor) is made by soaking the loquat seeds in vodka or grain alcohol. The strange thing about vodquat is that it doesn’t taste like loquats. It tastes like amaretto. The seeds have an amazing cherry aroma and impart that flavor to items it is cooked/soaked in.

I learned this recipe from Green Deane. He’s a forager in Florida, and I’ve learned a lot from him. (Check out his videos on YouTube!) Here’s Deane’s recipe for Loquat Grappa (his name for vodquat):

Soak one to two quarts of clean, whole Loquat seeds in a tight jar with a quart of vodka for one to six months. At the end of soaking time, drain the now flavored vodka and split it evenly between two fifth bottles. On the stove create sugar water by mixing equal parts of sugar and water. Heat until the sugar is dissolved. Top off each fifth with the sugar water. If you want it less sweet use less sugar, or more vodka.

I recommend waiting a month or two after finishing the vodquat with the sugar water before tasting. This will give it time to meld all the flavors together. And its true, the longer you soak the seeds, the more flavor your vodquat will have.

03181113 Vodquat Recipe

On a final note, vodquat makes a great gift. My family looks forward to getting a small bottle of home-made amaretto every year at Christmas. It’s a great cold weather treat, and it tastes all the better for having made it yourself. If you don’t have loquat trees on your property, keep an eye out for them while you are driving around town.

Loquat Tree

If you live in Florida, you are likely to drive by a tree or two no matter where you are going in the state. I have asked my friends to collect loquat for me from their trees and neighbors. Most people with loquat trees have more fruit than they know what to do with. So ask around, and I am sure you will be able to acquire enough loquat seeds to make plenty of vodquat for holiday gift-giving.


Saturday, March 16, 2013

Seasons Keeper

TWITTER logoFor the last couple of years now, I have been working on a better way to store and organize my seeds. Last year I attempted a storage notebook system, and I wrote about it here: http://backtourbannature.blogspot.com/2012/01/seed-organization.html.
That system worked for about a month. It was hard to get the seed packets back in the card holders, and as time went on, the open seed packets deteriorated and leaked seeds.
I decided that this cannot stand. I had seeds rolling around all over the place. I spent a week collecting the seed packets from all their hidey holes and did a massive accounting of what I had.
I am organized by nature, and tools like MS Excel only feed my desperate need to file and categorize. I listed all of the seeds that I had in an Excel spreadsheet and found that I had purchased several duplicates because I didn’t know what I had. Then I looked at that list and decided I would log all of the cultivation information from the seed packets so that I could do away with saving those packets forever. Now I was really getting into it. I added columns for seed source, ID#, cost, date of planting, potential harvest date, season, garden notes, etc. Now I really had something. I could use the spreadsheet to plan each seasons of planting, log when I planted, and schedule on my calendar when to harvest. The days of keeping the seed packets for their information was over!
Seasons Keeper Catalog sill
But if I am not keeping the paper seed packets, how am I storing the seeds? I knew I needed something that was compact, easy to use, and stored the seeds in airtight, freezer-proof containers. I did some research with manufacturers and came up with a storage vial organizer system.
single vial
case spread open
SK Case in Protector
I’ve taken my invention around to seed swaps and showed it to some fellow gardeners. I’ve received a lot of positive feedback about the system, and I had several people ask me to make them one as well. So I’ve decided to Kickstart my invention so that I can offer it to as many people as want it.
Seasons Keeper on Kickstarter
If you aren’t familiar with Kickstarter, it is a website where entrepreneurs can raise money through crowd sourcing to start their projects. Projects only get funded if they raise all of their goal amount. I’ve posted my project on their website and have listed nine backer levels with some great rewards.
If you have ever wished for a better way to keep your seeds, I encourage you to visit my Kickstarter and back my product. You can get a Seasons Keeper organizer, storage vials, and customizable electronic catalog for a pledge of just $30. And you will receive your reward by the end of May (in time for spring planting).

Friday, March 15, 2013

OGS Spring Conference – Beekeeping

I had the privilege of attending the 20th Annual Spring Conference of the Organic Growers School last weekend in Asheville, NC. This is my second year attending the event, and I can’t imagine ever missing it. I learn so much at this conference. Between the wonderful, knowledgeable people, fantastic class topics, and beautiful surroundings, this event has quickly become a highlight of my year.

This year I took classes on Beekeeping, Mushrooms, Goat Cheese Making, and Composting. I thought I should impart some of the things that I learned from these classes for those that didn’t get to attend. So here’s the first in my OGS series of articles – Beekeeping.

I’ve had beekeeping in the back of my mind for a while now. I feel like its important to keep bees for several reasons, but primarily for me it is for pollination and honey. I live in a rural area where there are a lot of small farms and tons of backyard gardeners. I know that having a couple of hives of bees will not only help my garden pollination, but it will also benefit everyone growing in a 3 mile radius of my hives.

Last year at OGS I took a class on mead-making. Since that class I have been cheerfully experimenting with making mead using honey from a local apiary that sells me one gallon of honey for $40. That’s not a bad price at all, but I want to really ramp up my mead making this year, and that is going to get costly at $40/gallon.

So I have a need for producing my own honey and keeping my own bees. That being said, I’ve drug my feet about it because of expense, time commitment, and fear of bees. The classes at OGS have alleviated all of these fears.

Lets start with some basics:

  • One of the best pieces of advice I got from both of the beekeeping classes I took was to get plugged into your local beekeeping clubs/organizations and to go visit other beekeepers hives with them. Both classes stressed the importance of getting to know bees and how to behave around them by apprenticing with a local beekeeper in your area. Not only will you learn a lot of technique, you will also get more comfortable dealing with the bees. This should help me get over my fear of bees.
  • Both classes stressed the importance of being calm when working with the bees. The first workshop recommended doing yoga or meditating right before entering the bee’s space. They claimed that the bees will respond to your energy in kind. Mary Beth Gwynn said that she often stands with her hand on the top of the hive for a couple of minutes to allow the bees to get used to her before she enters the hive.
  • When do you get bees? Well, it depends on your environment of course, but the general rule is that you order bees between November and February. That being said, if you hope to acquire bees through a swarm, that usually happens around April through June.
  • Where do you get bees? You can order packages of bees or nucs of bees from apiaries, or you can acquire swarms or splits from other beekeepers. Everyone seems to agree that purchasing a “nuc” of bees is the best way to get bees. Whichever source of bees you choose, you should get two hives of bees as a minimum.
    • Nucs are small, established colonies of bees that can be slipped into your hive and are ready to go. They are bees that have already been living and working as a hive.
    • If you buy packaged bees, you are getting an odd assortment of bees from many different hives and a queen none of them have ever met before. The quality of the bees is in question with this method, and it can take a while for all of the bees to decide to work together.
    • Splits of bees can be acquired from your local beekeeper who has a full hive and wants to avoid a swarm. You can find out about getting a split through your local beekeeping association/club.
    • Swarms are essentially free bees. Get on the swarm list through your local beekeeping association or extension agency. They will call you when they are going out to get an unwanted swarm from someone’s home. You show up, collect the bees (a Nuc box is perfect for this), and take them home to your awaiting hive. This is a great way to get free “survivor” bees.
  • What are “Survivor Bees”? The classes I took on beekeeping were on “Natural” beekeeping. Meaning no medications, pesticides, or chemicals are used on the bees. This style of beekeeping is also known as “Live and let die,” meaning that only the strong bees will survive to breed. If your bees die, well, then they weren’t the strong bees you want to procreate. Natural Beekeepers hope that if enough beekeepers practice natural beekeeping, eventually bees will be bred for natural resistance to varoa mites and other diseases.
  • Expense – there are predominantly two types of bee hives: Langstroth hives and Kenyan Top Bar hives. The two are very different and cost is just one of the ways they differ. Top Bar hives are significantly cheaper than the more classic Langstroth boxed hives. Here’s why:
  • Langstroth Hives are the classic bee boxes you see whenever you think of beekeeping. Generally there is a large brood box topped by a series of further brood frames and honey frames. This style of beekeeping yields a lot of honey and allows for a large, expandable hive.

031513 lang hive

A downside is that these boxes get very heavy when full of comb and have to be moved to inspect the lower boxes. These boxes use frames with starter comb that the bees build upon. To harvest the honey the frames are removed, the caps are sliced off and the frames are spun in a honey extractor. The empty combs are then returned to the hive so that the bees can refill them with honey. This is a great energy saver for the bees, but can also keep diseased wax in the hive.

These hives usually have 8 or 10 frames per box, and are usually 4 or 5 boxes high for a full hive of bees. As production of honey ramps up, additional boxes with the frames can be stacked on top to help the bees expand their production.

031513 diagram of Lang hive

  • Kenyan To Bar Hives have one long box that is shaped like half a hexagon. Viewed from an end it looks like this: \_/. Then there is some sort of slightly pitched roof that just rests on top of the hive.

031513 TBH

Instead of frames, a TB hive uses bars that are set on top of the hive. The bees make their comb directly on the bars. The main job of the beekeeper with this style of hive is to ensure that the bees build straight combs and to reshape any curved comb. The bees will naturally build their brood combs on the first couple of bars, and will leave the honey combs to the rest of the bars.

031513 empty top bar hive

One of the downsides of this type of hive is that you will be able to harvest a lot less honey. This is because you will not be reusing comb, so the bees will spend a lot of their energy making comb. it takes 8 pounds of honey to make one pound of comb. The comb is not reused because they are more fragile hanging from the top bar.

031513 bees building combe in TBH

To extract the honey, the comb is crushed and strained. Tom Knaust (who taught the Top Bar class I took) recommended taking two 5 gallon bucked, drilling holes in the bottom of one bucket and stacking that bucket on top of the other. Then place a strainer on top of the buckets and crush the comb in the strainer. This method allows you to have strained honey and a bucket full of bees wax.

TB Honey Extraction

So this method will provide you with less honey, but it is also a lot cheaper to get started because you can construct your own hives and cheaply extract the honey. Cost estimates for starting out with two hives runs roughly $300 for Top Bar hives and $1,000 for Langstroth hives.

Other benefits of Top Bar hives is that they tend to house happier, healthier bees. Top Bar bees seem to be less susceptible to diseases. They tend to be happier bees, because you are not changing their temperature when checking on them, the way you are when you are breaking down the chimney of the Langstroth hive.

After taking a class on both I think that I will try Top Bar hive beekeeping. It is a method that I can start cheaply and right away. It does take a little more time and management on my part, but right now I have more time than I have money. Also, I only want a couple of hives for home use, so not harvesting as much honey as I might with a Langstroth hive is not such a large detraction.

The following are a series of resources I acquired at the the classes:

BOOKS

The Practical Beekeeper (several volumes) by Michael Bush. Bush also provides a lot of fantastic content for free on his website: www.bushfarms.com/bees

Natural Beekeeping: Organic Approaches to Modern Apiculture by Ross Conrad.

Honeybee Democracy by Thomas Seeley

Top Bar Beekeeping: Wisdom & Pleasure Combined by Wyatt A. Mangum, PhD. This is THE comprehensive text on keeping Top Bar hives.

The Barefoot Beekeeper by P.J. Chandler

Top Bar Beekeeping by Les Crowder

WEBSITES

http://www.biobees.com/ – source for free step-by-step instructions on how to build a horizontal top bar hive, and loads of information about top bar beekeeping.

http://www.anarchyapiaries.org/ – is filled with interesting thoughts and lots of info on keeping bees in alternative hive structures.

http://www.beesource.com/ – all things bees

http://www.bushfarmscom/bees.htm – a wealth of experience-based knowledge with great photos.

http://www.tbhsbywam.com/ – top bar info and links to buy the bible of top bar beekeeping by Wyatt Mangum (see books above.).

http://www.holybeepress.com – This is Debra Roberts’ (who taught my beekeeping workshop) website

http://www.fortheloveofbees.com – this is bee book author, Les Crowder’s website.

http://www.naturalbeekeepingtrust.org – home of the Natural Beekeeping Trust

http://www.brushymountainbeefarm.com/Resources – offers fantastic text resources, pictures, and video classes for beekeepers from beginner to commercial beekeepers.

https://www.youtube.com/user/FatBeeMan – this is Don Kuchenmeister’s YouTube channel. He has tons of practical, how to videos.

FORUMS

http://www.beesource.com – go to “The Exchange” for their forum.


Thursday, February 28, 2013

My Garden’s Been Poisoned!

No joke, my garden has been poisoned. And as far as I can tell, I have Dow Chemical to ultimately blame.

I live in Florida and our ground is just sand. I have to amend and create my own garden soil. So I compost, add fish emollient, and pick up loads of horse manure from a local farm.

A couple of months ago, my neighbors and I got a load of manure from the horse farm to use in our spring beds. We have been doing this for years with great success. We pick up a trailer load of partially composted horse manure, bring it home, finish composting it, and then use it as the soil in our garden beds. Well, the manure has been composted, and we began filling our beds with it.

I used the new compost in a bed that currently is half full of greens. I spread the compost in the empty half of the bed and direct sowed Wando Peas, broccoli, and carrots. The peas came up first and looked a little weak, but it’s been cold and dry, so I chalked it up to that. The broccoli came up and looked good. The carrots never even sprouted. As the peas grew, it became obvious that something more than dry weather was the problem.

Herbicide Poisoned Pea Plants

At that same time, my Feb/March issue of Mother Earth News arrived. In it was an article called, “Killer Compost Update: Herbicide Damage Still a Major Problem.” The picture that was displayed with the article caught my attention because it looked just like my peas.

022813 burned pea plant 3

The article explains that two Dow AgroSciences herbicides (picloram and clopyralid) are being found in composts and animal feeds. My heart sank. I had the terrible suspicion that my new compost was contaminated.

I called my neighbor to see if she had used the new compost yet, and if so, what her results were. She walked me over to her bed of English Peas. They were all dead or burned and wilted. We had become the victims of Killer Compost.

The horse farm does not use herbicides themselves, so they were introduced either through the hay or through the Purina horse feed. Either way, our ton of compost is toxic and we have no way of knowing if any alternative sources of manure will be herbicide-free. If the herbicide was introduced through the Purina feed (as Mother Earth explains is a very good possibility) we will have to find an organic farm that feeds only organic grains, grasses, and hays.

There is no remediation for picloram or clopyralid once it has been introduced. It will remain active in the soil for years. My neighbor and I have to dig up our beds and remove all of the toxic compost. What we do with it then is up for debate. It survives digestion and hot composting, so there doesn’t’ seem to be any way to break it down. We will either spread it on walkways or burn it.

Mother Earth is calling for these persistent herbicides to be outlawed entirely before it becomes impossible to grow organically. Please join their fight with me. Write to Richard Keigwin, director of the EPA’s Special Review and Reregistration Division at keigwin.richard@epa.gov to let him know about your concerns.


Thursday, February 21, 2013

Seed Swap

One of the great things about seeds is that they are so easy to save and swap with others. I love trading seeds with my friends and neighbors. It allows us to broaden our plant varieties without stretching our budgets.

I recently got the opportunity to swap with a friend of mine before he left for a vacation. He had already started the seeds, so instead of baggies of seeds, I got two trays of seedlings! The first tray had bush beans and English peas. I just started peas in my beds, so I am really looking forward to getting these seedlings in there and having some succession harvesting ahead of me.

022113 sprouts 1

The second tray had watermelon, tomatoes and cucumbers.

022113 sprouts 2

Clint was afraid that these seedlings wouldn’t survive his absence while he is on vacation. So I swapped him seeds for his seedlings that he could plant when he returns. I gave him some corn, ground cherries, peppers, and Dragon Tongue bush bean seeds.

Seed saving and swapping has a long and important history. It has been vital to the preservation of heirloom varieties of seeds. Heirlooms are necessary because they represent culturally diverse and endangered crops and agricultural freedom. A diverse seed catalog is a cornerstone of food security. If growing seed that has been selected for your region, soil, weather, and superior flavor is important to you, then you should definitely consider taking part in this long held tradition.

Seed saving and swapping is the best way to break the hold that Mega Corps like Monsanto and Dow have on our agriculture. To further support conserving and promoting heirloom seeds, consider joining the Seed Savers Exchange. Not only do they do great work to support an enormous variety of ancient seeds, but they also offer members fantastic educational opportunities and a good discount on seed purchases.

So start talking to your friends and neighbors. Find out what kind of seeds they have laying around the house. Seed swaps are fun and economical, and they are good for plants too.

Blogger Labels: Swap,friends,tray,bush,English,succession,corn,Dragon,Tongue,history,preservation,Heirlooms,freedom,catalog,food,region,tradition,Mega,Corps,Monsanto,agriculture,Exchange,Find,plants,Savers,members,neighbors,peas,heirloom

Sunday, February 17, 2013

Seed Starting for Spring 2013

Well, its nearly spring here in Florida, and with days that have highs in the 80s, some might contend that spring has already sprung. We have at least on quick freeze likely to hit us this weekend, and then I think we will be officially on a warming trend. And if that’s true, then there is no time like the present to get my spring seeds started!

Last year I bought a tool to make my own paper seed starter pots. I blogged about it here:Time to start seeds? 

Yesterday I had an afternoon free and began making my fully biodegradable paper pots and starting some seeds. Here’s what I have done so far.

  • I made 64 little newspaper pots. I love this method because it recycles my junk mail and makes pots that won’t bind root systems.

021313 paper pot

  • Then I planted the following organic heirloom seeds:

021313 Seed Starts 1

    • 4 Kerala Red Amaranth
    • 4 Love Lies Bleeding Amaranth
    • 2 India Jwala hot peppers
    • 2 Tam Jalapeno peppers
    • 4 ground cherries
    • 4 Dragon Tongue Beans
    • 4 Mammoth Sunflowers
    • 4  Moonwalker Sunflowers
    • 4 Burgundy Okra
    • 4 Purple Beauty Peppers
    • 4 Sweet Red Stuffing peppers
    • 4 Friariello Di Napoli peppers
    • 4 Amy’s Apricot tomatoes
    • 4 Homestead tomatoes
    • 4 Black Cherry tomatoes
    • 4 Yellow Wonder Strawberries
    • 4 Jewel Nasturtiums

021313 Seeds Starts 2

A lot of these seeds are new to me, so it will be a real experiment to see if I cultivated them correctly. I am really excited to be growing Amaranth this year. I have been reading about it’s super-food status, and I love the idea of growing something that I can eat the leaves and harvest grain. I plan to devote the bed I have in the front yard to the Amaranth because I think it will be pretty enough to proudly display.

I am keeping the seed starts in my little 3-Shelf greenhouses while it is still cold at night. I plan to do another 64-100 more starts to get me through spring and summer. I’ll update when I get those going too.

Isn’t this the best time of year? Don’t you just love all of the possibilities? Every one of these little pots of dirt represent a potential harvest to me. And I am so excited to find out if my investments will profit. It is amazing to think that these small trays will develop into whole large beds of plant life in the coming months. I can’t wait to see them all grow up!

Windows Live Tags: Florida,trend,Last,tool,paper,starter,Time,afternoon,Here,newspaper,method,Kerala,Amaranth,Love,Lies,India,Jwala,Jalapeno,Dragon,Tongue,Beans,Mammoth,Sunflowers,Moonwalker,Burgundy,Okra,Purple,Sweet,Friariello,Napoli,Apricot,Homestead,Black,Cherry,Wonder,Strawberries,Jewel,Nasturtiums,food,status,grain,yard,Shelf,possibilities,dirt,investments,life,systems,greenhouses,tomatoes
Blogger Labels: Florida,trend,Last,tool,paper,starter,Time,afternoon,Here,newspaper,method,Kerala,Amaranth,Love,Lies,India,Jwala,Jalapeno,Dragon,Tongue,Beans,Mammoth,Sunflowers,Moonwalker,Burgundy,Okra,Purple,Sweet,Friariello,Napoli,Apricot,Homestead,Black,Cherry,Wonder,Strawberries,Jewel,Nasturtiums,food,status,grain,yard,Shelf,possibilities,dirt,investments,life,systems,greenhouses,tomatoes

Friday, February 15, 2013

It’s Sauerkraut Season


Here in Northeast Florida, it is cabbage season. All around me are fields full of bright green, dark green, and purple cabbages. They are in such an abundance that I do not bother to grow any myself. I do, however, buy them from the local produce stand (The County Line) and make delicious, lacto-fermented Sauerkraut.

Making lacto-fermented Sauerkraut is super easy. Basically, you just let the cabbage and brine sit for a week. Here’s the details:

  1. You will need a large container to pound the cabbage in, a container for fermenting (I’ll discuss this later), a potato masher, sea salt, spices (optional, but I like celery and caraway seed and black sesame seed).
  2. Shred or thinly slice a couple of heads of cabbage. It can be any cabbage you like. I prefer to use the beautifully colored red cabbage and the crunchy savoy cabbage for my sauerkrauts.
  3. As you add the sliced/shredded cabbage to the large container, lightly salt each layer and give it a good pounding with the potato masher.
  4. Continue layering, salting (and spicing if using) and pounding until you run out of cabbage.                            021213 crushed cabbage
  5. Let the cabbage sit in the container for several hours. Give it a good pounding every 15-30 minutes. You are looking for the cabbage to start expressing its water. You want to get as much water out of the cabbage as possible.
  6. At the end of the day or when you feel you have a good brine started, begin to pack the wet cabbage into your pickling container. I use The Picklemeister glass fermentation jar. This is a great contraption. It has a gallon capacity  and a fitted airlock so you don’t have to worry about contamination. You can use a regular jar and cover it with cheese cloth, but you will need to remove the scum from the top of the surface every couple of days. With the Picklemeister, this is not necessary.
  7. As you add the cabbage to your fermenter, make sure you mash it down very tightly. Hopefully, there will be enough natural brine to cover the top of the cabbage in the fermenter. If not, add a cup or two of saltwater solution (1tablespoon per 2 cups of water should be sufficient) to the cabbage.
  8. Weigh the cabbage down so that it is fully covered by the brine. If you are using an air-locked fermenter, cover it and add the airlock now.021213 Sauerkraut
  9. Next, you just wait. Give the cabbage a taste every day or so to track how the fermentation is going. Here in Florida, where it is fairly warm, it usually only takes 5-7 days to reach a fully mature sauerkraut.
  10. Once you reach a taste that works for you, move the sauerkraut to the refrigerator. This will keep the bacteria from continuing to work and making the kraut too sour. As long as the cabbage remains under the brine the kraut will remain delicious and full of beneficial lactobacillus. You may also can the sauerkraut at this point to keep it shelf stable, but this will kill off the beneficial bacteria.

I hope you give this easy fermentation craft a try. It will turn even a hot dog into a mouthwatering meal!

Wednesday, February 13, 2013

The Organic Growers School Conference

I am planning a trip to the Organic Growers School Conference again this year. I can’t wait to take some courses on backyard beekeeping, mushroom growing, and cheese making!

Last year I went and it was a transformative experience. I learned so much that has continued to enrich my life, and the lives of those I care about. I knew then that I would be making the OGS Conference a yearly experience.

There’s still time to register. Go to the OGS website for more information on the class and workshop schedule. I’m caravanning up from Florida with some of my girlfriends. I hope we see you there!